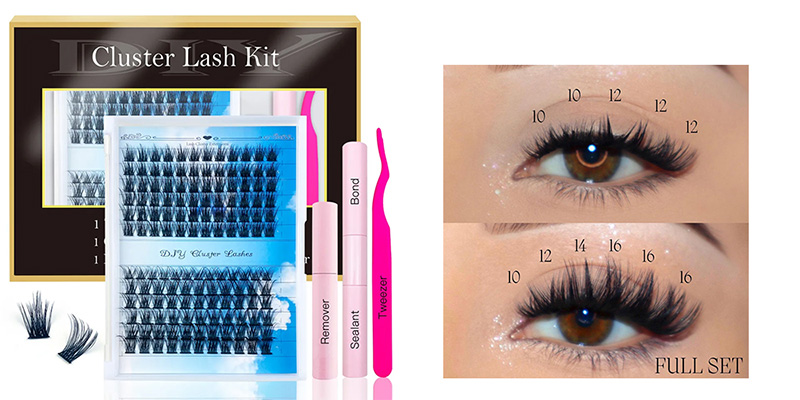
DIY cluster lashes are a popular choice for those who want to achieve a full and voluminous lash look without the cost of professional eyelash extensions. With DIY cluster lashes, you have the flexibility to customize your lash style and create a more natural or dramatic look, depending on your preference. By following a few simple steps and using the right tools, you can easily apply DIY cluster lashes at home and achieve salon-worthy results.
1. Benefits of DIY Cluster Lashes
When it comes to DIY cluster lashes, there are several benefits to consider. Firstly, DIY cluster lashes allow you to customize your look according to your preferences, whether you want a natural or dramatic effect. Secondly, by doing it yourself, you can save money compared to getting them professionally done. Additionally, DIY cluster lashes give you the flexibility to experiment with different styles and lengths without the commitment of permanent extensions. Lastly, the satisfaction of achieving a beautiful lash look on your own can boost your confidence and make you feel empowered.
2. How to Choose the Right DIY Cluster Lashes Kit
When choosing the right DIY cluster lashes kit, it's important to consider a few key factors. Firstly, look for a kit that includes a variety of lash lengths and styles to suit your desired look. Additionally, opt for a kit that includes high-quality adhesive to ensure your lashes stay in place. Lastly, consider the level of difficulty - if you're a beginner, choose a kit with easy-to-follow instructions. By keeping these factors in mind, you'll be sure to find the perfect DIY cluster lashes kit for your needs.
3. Step-by-Step Guide to Applying DIY Cluster Lashes
When applying DIY cluster lashes, it's important to follow a step-by-step guide for best results. Start by preparing your natural lashes with mascara. Next, choose the right size clusters for your desired look. Apply a small amount of lash glue to the cluster and place it on your lash line, starting from the outer corner and working your way in. Press gently to secure the cluster in place. Repeat this process for each cluster, allowing the glue to dry between applications. Finish by blending your natural lashes with the clusters using mascara for a seamless look. With practice, you'll master the art of DIY cluster lashes in no time!
4. Common Mistakes to Avoid When Using DIY Cluster Lashes
When it comes to DIY cluster lashes, it's important to avoid some common mistakes to achieve the best results. One mistake to avoid is using too much glue, which can make the lashes clump together and look unnatural. Another mistake is not trimming the lashes to fit your eye shape, leading to discomfort and a less natural appearance. Additionally, pulling off the lashes too roughly can damage your natural lashes. It's also crucial to not reuse cluster lashes as this can lead to eye infections. Lastly, avoid applying clusters too close to your waterline to prevent irritation. By steering clear of these mistakes, you can create beautiful, natural-looking DIY cluster lashes.
5. Conclusion: Embrace Your DIY Cluster Lashes with Confidence
Embrace your DIY cluster lashes with confidence by following the tips and techniques outlined in this article. With the right tools and practice, you can achieve professional-looking results from the comfort of your own home. Experiment with different styles and lengths to find the perfect look for you. Remember, practice makes perfect, so don't be discouraged if your first attempt isn't flawless. Keep refining your skills and soon you'll be a DIY lash expert. Enjoy the process and have fun experimenting with your new cluster lashes!


